
Last week I constructed the muslin or test garment for the Jasika Blazer. This week, I’ve been working on the fit of the muslin.
Overall
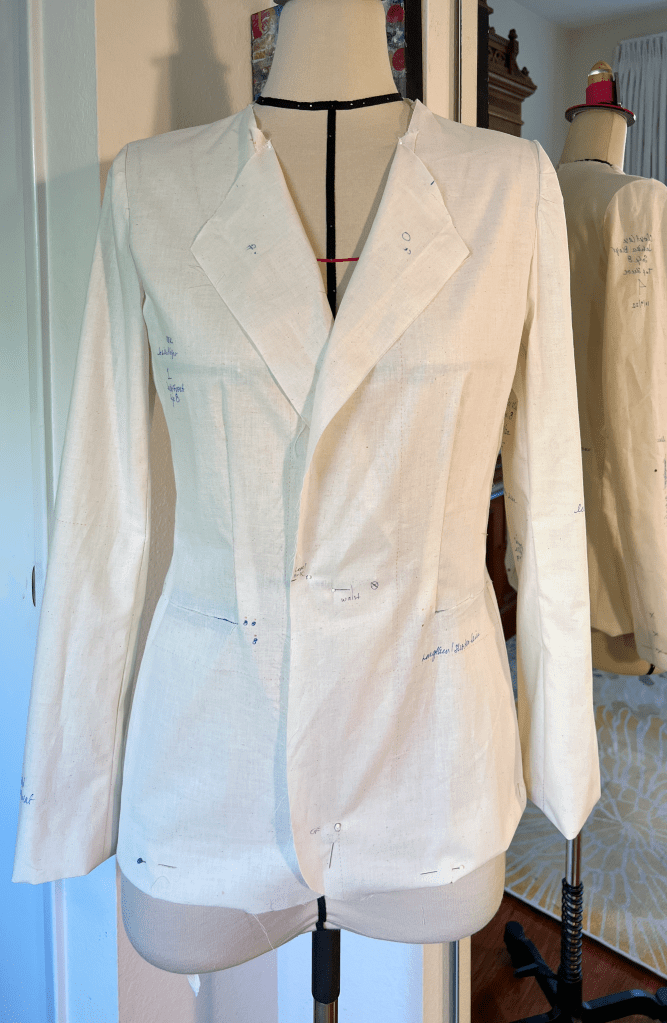
Overall, the fit is pretty good and won’t require drastic changes. The front fits better than the back.

But there are a few things I want to address. The table of Fit Problems and Solutions below will tell you quickly what I’ve tried so far. If you want to see photos of some of the changes, those follow in sections. Strikethrough text in the Solution column means I tried it and it didn’t help.
| Symptom | Solution* | Pattern Pieces Affected |
| Wrinkles in the upper bust and back shoulder | Add shoulder pads | No changes to pattern pieces |
| Back vent opens | Stitch the vent top closed per instructions on page 23 | No changes to pattern pieces |
| Sleeve looks backward tilted | Rotate sleeve forward 1/4″ | No changes to pattern pieces |
| Sleeve is too short | Add 5/8″ at lengthen / shorten line | Sleeve upper and lower, sleeve lining upper and lower |
| Diagonal wrinkles in the upper back | * * Rotate the shoulder seam and sleeve cap 3/8″ forward * Raise sleeve cap 1/4″ * Release the upper back 1/4″ horizontally | Upper sleeve and back bodice |
* These solutions came from a variety of sources. Many were suggested by Beth Galvin, teacher of my Tailoring class. Some came from the Beatrice Dress Collective Forum. And a few sprouted from my own midnight imagination. Any errors are mine and mine alone.
Shoulder Pads
Right away, an amazingly easy fix is to add shoulder pads. Shoulder pads helped eliminate some of the wrinkles in the front and back shoulder area. The ones I used are made of batting and are 3/8″ high at the armscye.


Rotate Sleeve
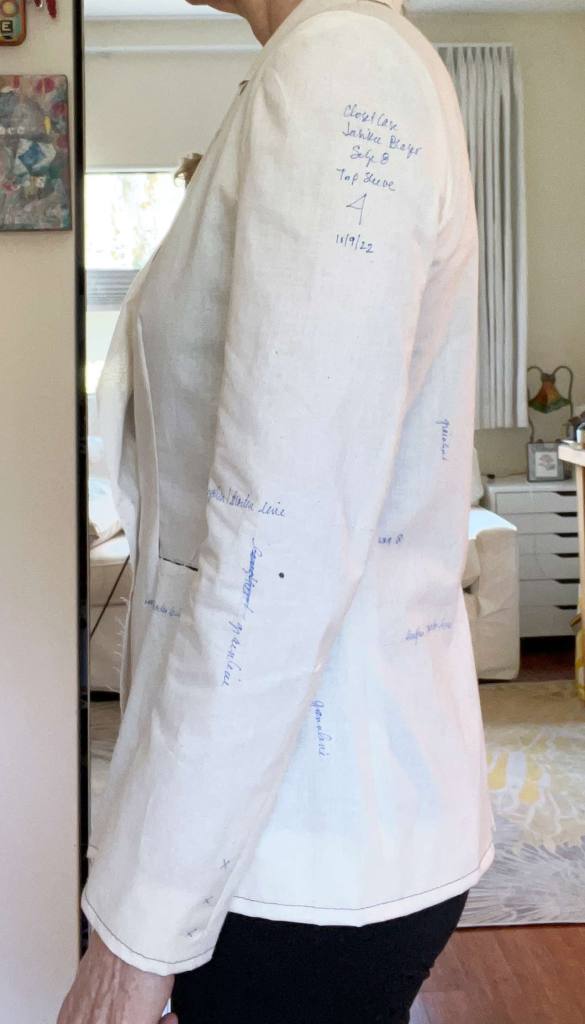
The sleeve looks tilted backward in the side view so I rotated that forward 1/4″.

Lengthen Sleeve
The sleeves stopped above my wrist so I added 5/8″ to the length at the lengthen/shorten line on both the upper and lower sleeve.
Problem-Solving the Back
The diagonal wrinkles in the back proved a bit stubborn. I tried a number of things. If a fix didn’t work, I backed it out.
Shoulder Slope
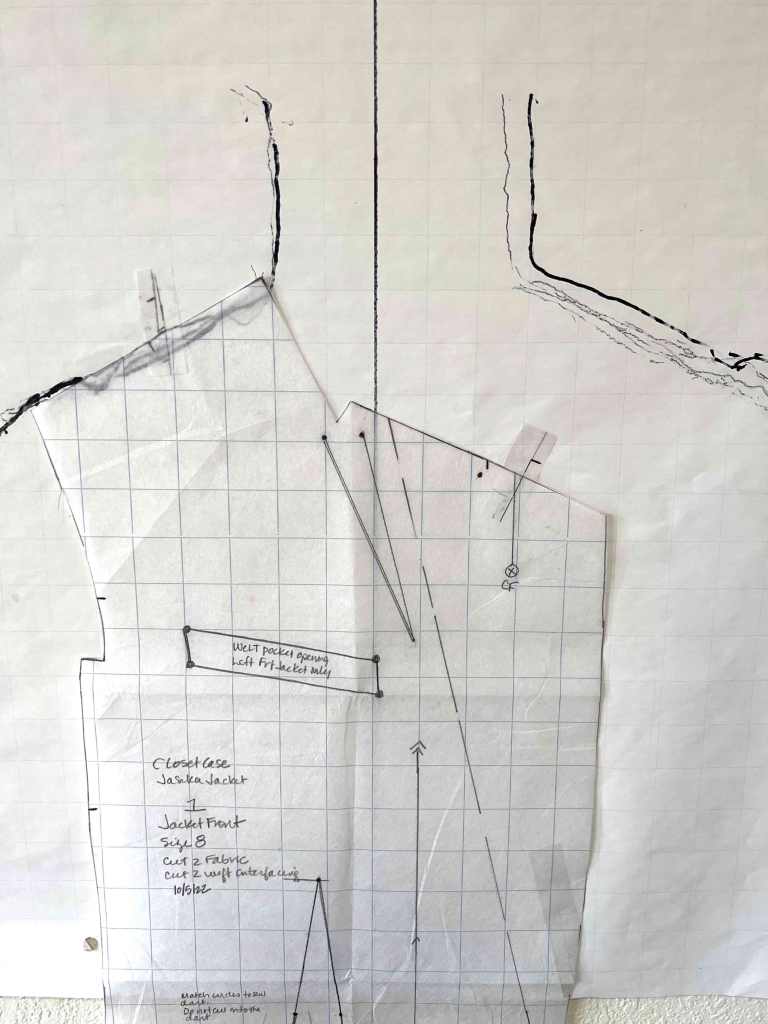
Shoulders form the hanger for the jacket. I needed to verify that the shoulder slope of the pattern matched my shoulder slope. My husband traced my outline on a piece of poster paper. Our walls are textured so it’s quite a bumpy outline but it is good enough. I taped the front bodice pattern to the tracing, matching vertical grainlines. The slopes are similar. So that’s okay. No change required
Sleeve Cap Height
I made two new sleeves to experiment with adding height to the sleeve cap. Grading up each size gave me 1/8″ more height. I can grade up to 1/2″ and still manage to ease it in. I tried one sleeve with 3/8″ (on the right in the photo) and one sleeve with 1/4″ (on the left side of the photo). In this case, less addition seems more.

Rounded Shoulder
My rounded shoulder could be part of the cause of the diagonal lines. I released the fabric over the curve. This helps somewhat but turns the back into more of a board.

I’m not yet happy with how the back looks. I’m going for more of a hug-the-shoulders and back look of the flight suits for the crew on the Rocinante in The Expanse. More studying is required!
Next week, I’ll work on another muslin in a fabric with a similar weight to the final version and continue working on the fit of the back. Whew!
