
This is a story about the making of vintage pattern Simplicity 4237, a blouse with a deep back yoke, short cuffed kimono sleeves, and a sweetheart collar that dips in back. Update: Simplicity has just reissued this pattern as Simplicity 8445!
Part 1: The Ingredients
I found this Vintage pattern at Scrap PDX, a creative reuse nonprofit in Portland, Oregon, before COVID. Periodically, I go there and sort through 100s of patterns, some with parts, some not, and always find something inspiring. The aloofness of the ladies illustrated on the pattern seemed sculptural, perhaps more dead than alive, but nonetheless exhaled a confidence and soignée that I admired but did not feel.
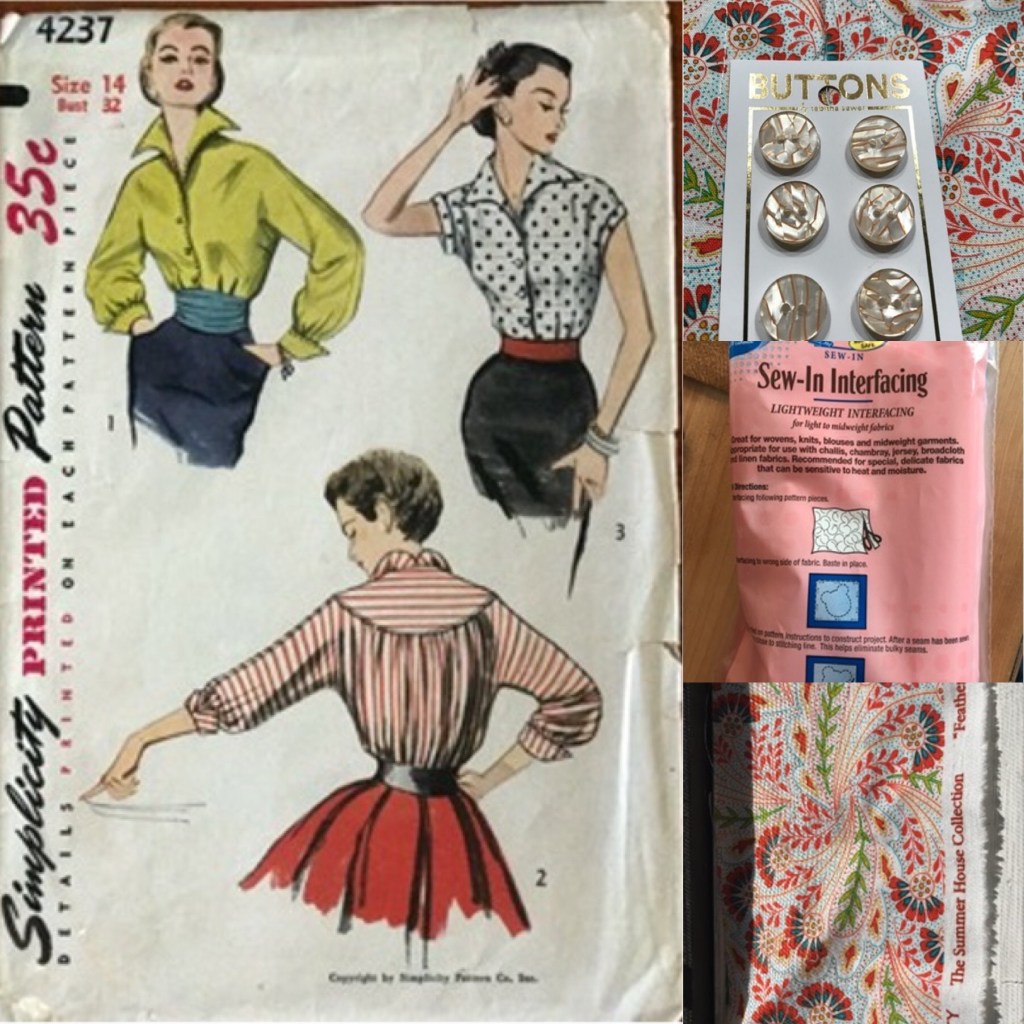
A solid fabric in robin’s egg blue would highlight the tucks featured in this pattern but the illustrations also showed a version with stripes and polka dots. Since fabric patterns were fair game I chose a cheerful orange and teal Liberty fabric at 50% off at the Mill Ends store. The non-directional fabric pattern would be easier to layout correctly than a directional one and require less yardage.
Later, I selected buttons. A matching orange or teal button would have called attention to the button, providing an anchor in the sea of pattern. Instead, I opted for gold threaded buttons from Tabitha Sewer (love her!!) purchased at Needles Studio that are YES flashy and gorgeous.
Part 2: The Process
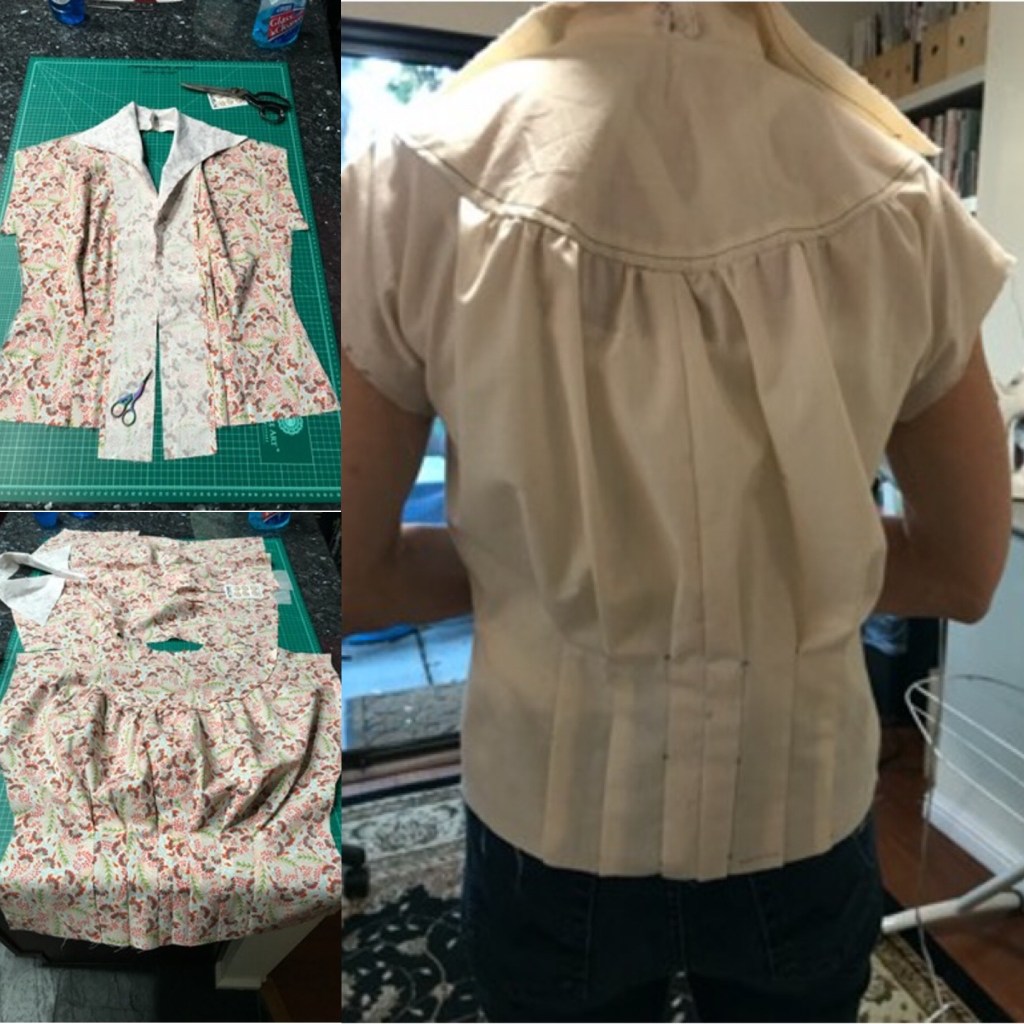
I first made a muslin. Some people make muslins that are as polished as the final product, but that hasn’t been my accomplished practice yet. I call my muslin an “autopsy” because I use it to figure out what went wrong. When we get to Part 3: The Collar, you’ll see what I mean.
You’re “supposed to” make muslin’s until you get it right and then go on to the final fabric. However, muslin, as a fabric, lacks some of the challenges of the final fabric such as having a right side and a wrong side, or having a pattern to match. In a sense, it is not a worthy adversary. So I went early to the next step. I chose to make the second version in patterned fabric.
Part 3: The Collar
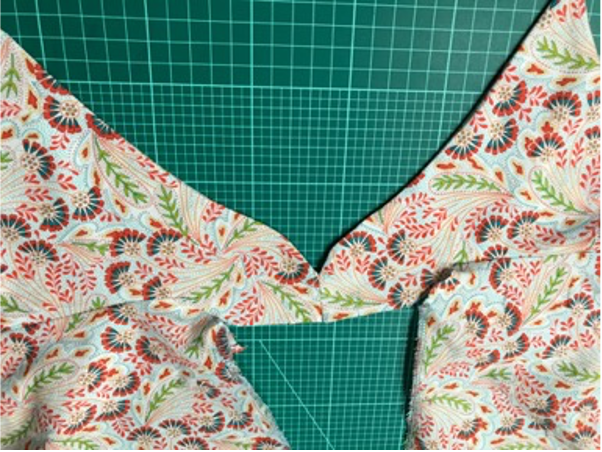
The blouse collar has a lovely dip in the back, perfect to accentuate a long neck with upswept or short hair. In principle, I was all in. In practice, I struggled to understand how to make it happen. In the collage below you can see the collar illustration and instructional drawing from the pattern, my muslin collar with the dip done wrong, and then the final version with the dip done right.
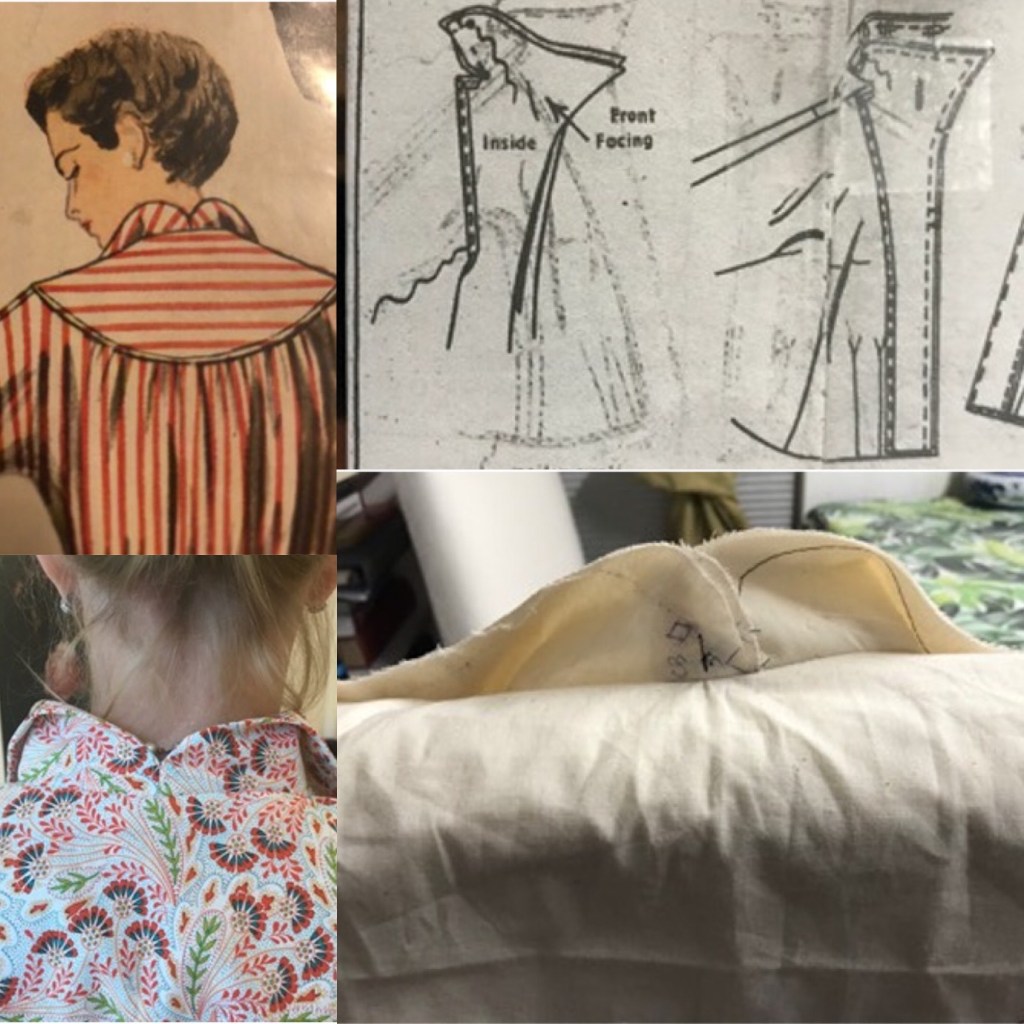
It’s useful to see how the left and right sides of the bodice flow to meet at the back of the neck.
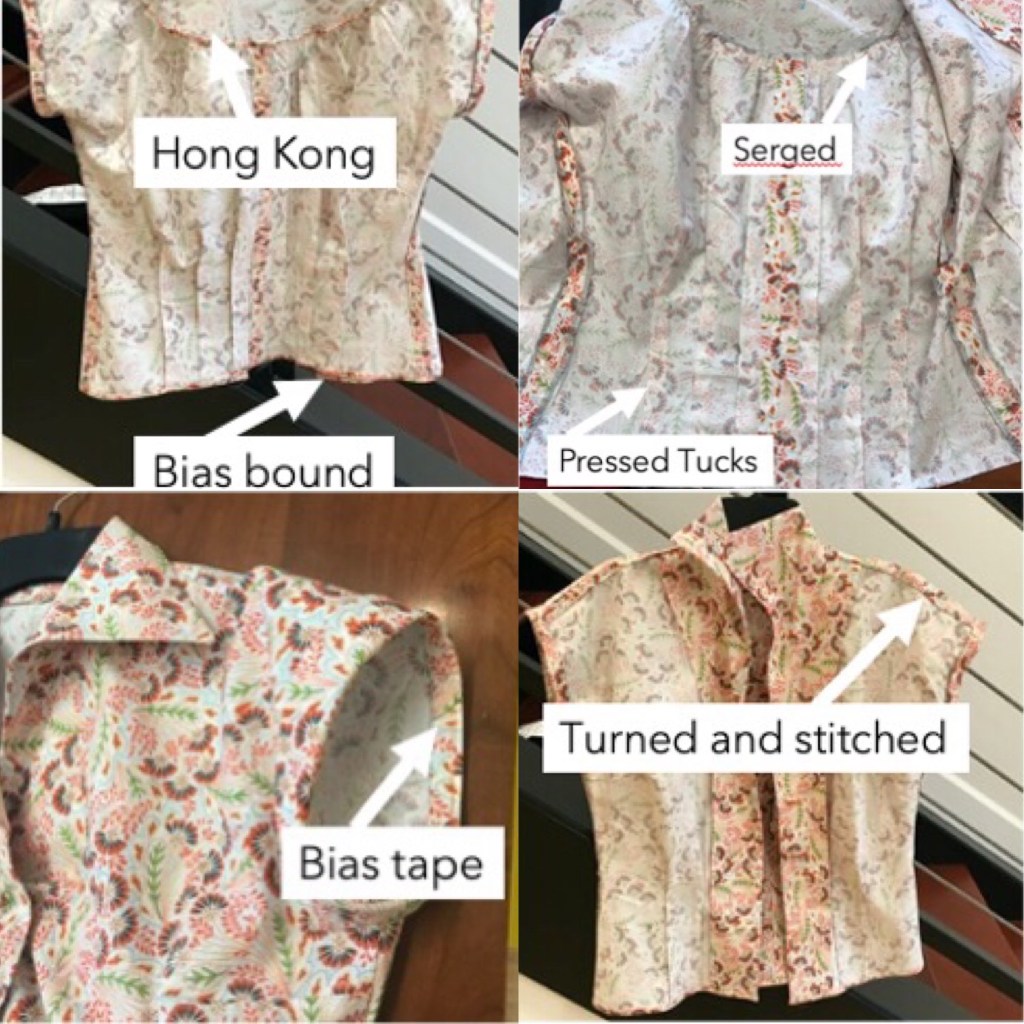
Part 4: Seam Finishes
I had admired others’ neat and tidy edges. I didn’t want the frayed edges of often washed seam allowances to make this garment look unloved. So I spent almost as long finishing seams as I did constructing the blouse. I wasn’t sure what finish to use where so I made it up as I went along.
- Hong Kong binding for the ruffled edge of the back yoke gather to cover up the serger tracks. Too bulky!
- Shirt hem is bias bound. It could have been a rolled edge hem if I was the boss of my serger or with the rolled edge hem foot on my Singer Featherweight.
- The tucks in the front and back bodice are pressed.
- The sleeve cuffs are bound in self-made bias tape.
- The shoulder and center back seams are turned under and stitched through.
Part 5: The Finished Blouse
I love the way the design elements turned out. The version that I made is not as sophisticated nor as starchy as the illustrated ladies. It has more whimsy. I still pine for that Breakfast at Tiffany’s cultured look but my choices keep taking me in a different direction.

I plan to make this blouse in a black and white polka dot next. But I also keep thinking about ways to introduce an element of surprise. Like red piping or red and white polka dots for the facing. I’m not sure I can just leave it be. The fabric is waiting for me to pin the pattern pieces to it. We’ll see.
See you next time! Thank you for reading!

I love the way you describe the process. Thanks for sharing.
LikeLiked by 1 person
Thank you Rosa!
LikeLike