
I recently designed a garment for the first time and made it up in fabric. The process really made me appreciate what we can do with patterns and the amount of agency that learning to create patterns provides. The purpose of this post is to share the process of that first design with you and to remind myself of it as well for the next time.
Statement Sleeves

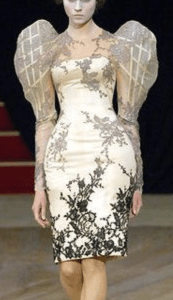
For this garment, Alexander McQueen’s statement sleeves inspired me, specifically his leg of mutton sleeves. These sleeves were in fashion in the 1820s-1830s and were named because they look like the hind quarters of an animal. McQueen sleeves remain to this day statement sleeves.
My ambitions were more pedestrian. I wanted to make a princess sleeve of normal proportions and join two of them to a bodice.
My first step was to find the pattern in the book used for my class on Flat Pattern. It definitely helps to refer to how someone else has done it.
Steps
Here are the next six steps. The images below show each of these first 6 steps in 2 rows. Read left to right.
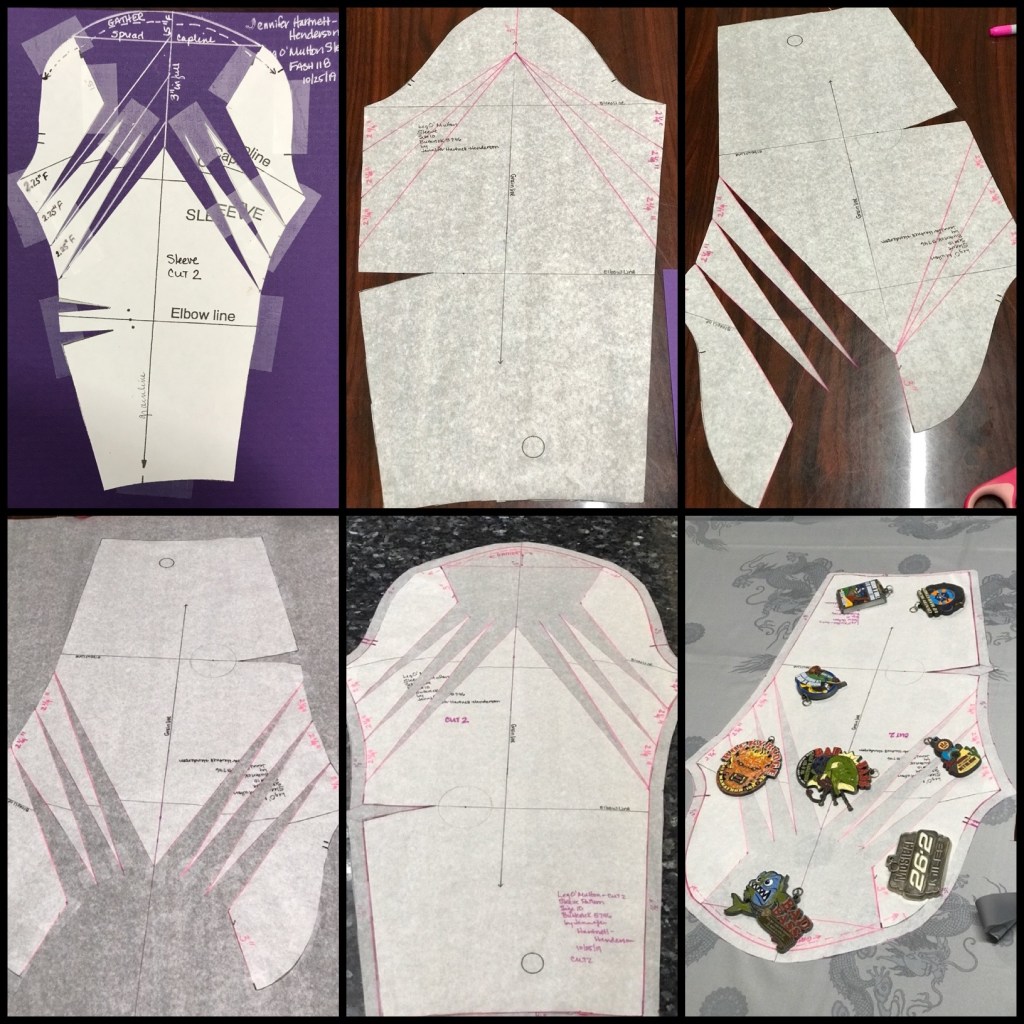
- Practice the design in 1/2 scale, then 1/4 scale.
- Trace the foundation pattern or oak tag sloper onto tissue paper and draw in the pattern manipulations
- Slash and spread the pattern
- Tape the pattern to tissue paper
- Draw in seam allowances
- Position the pattern on the fabric matching grainlines in fabric and pattern.
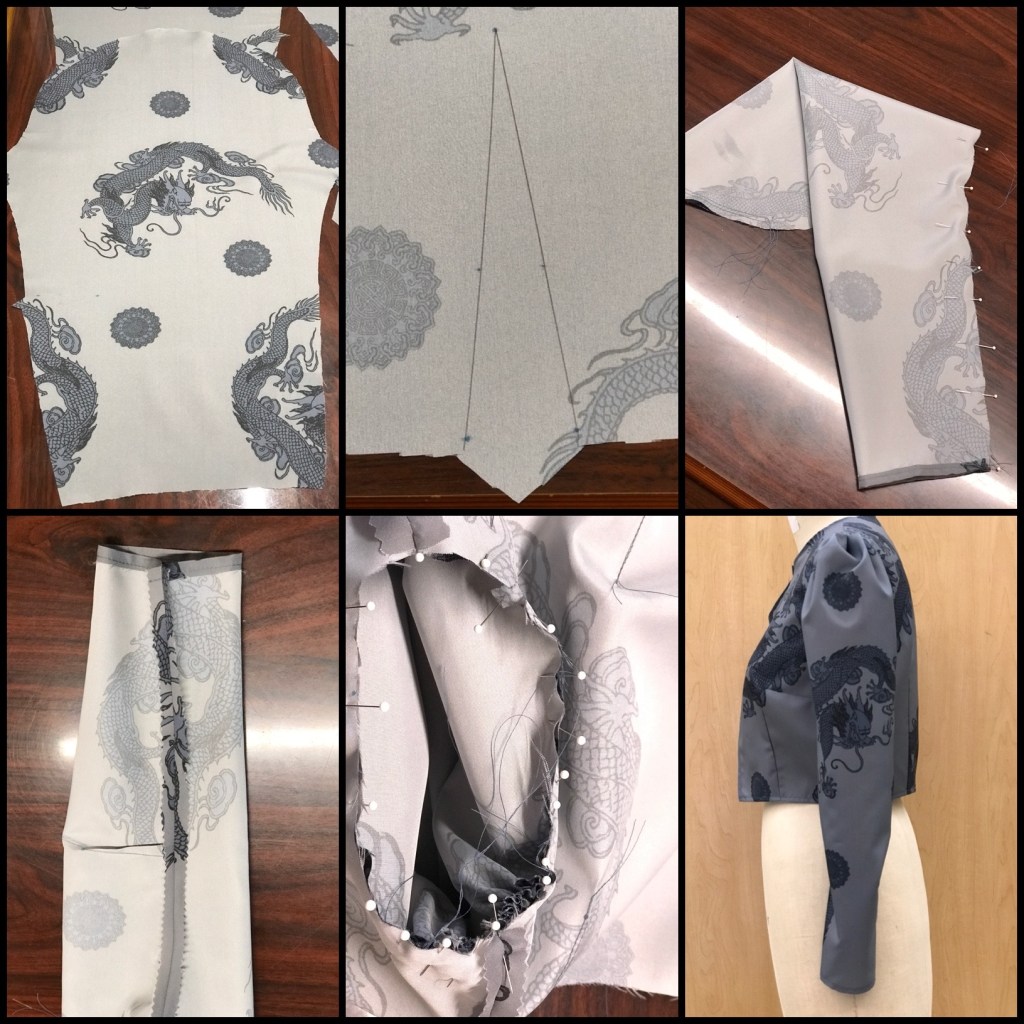
The next six steps shown below. Read the images left to right.
- Cut the sleeve out of fabric
- Draw in the dart (The dart in the image is from the back bodice. The elbow dart is much smaller and can be transferred to the wrist. Next time:)
- Pin the sleeve
- Sew the seam, pink the edges (I would have serged the edges before seaming but my serger was misbehaving on this day) and press the seam open
- Gather the sleeve cap and pin the sleeve to the armscye, right sides together, sleeve inside bodice. Not shown – sewing the gathering lines and gathering the sleeve.
- Turn right side out
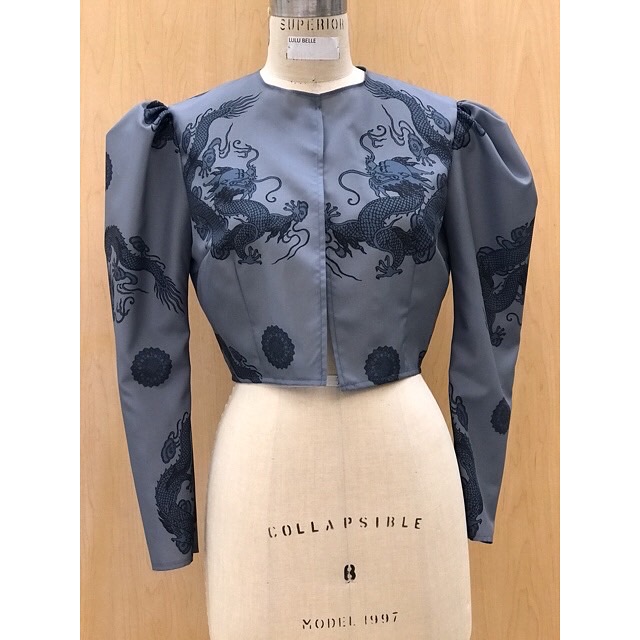
Finalmente!
The final joy was seeing the whole garment on a dress form and sharing the journey with classmates at Cañada College, each of whom had selected a different sleeve to design:

I am thrilled with what I learned in this process and very pleased with how the garment turned out. I wasn’t fast at all. It took me between 8 and 12 hours to do this and I had to break it down into little steps to keep myself on track. But the result is so rewarding!
by Jennifer Hartnett-Henderson ©2019

by Jennifer Hartnett-Henderson
Thanks for reading and for sharing the journey with me!

Simply gorgeous. Love your posts. So admire your talents.
LikeLike
Connie thank you so much! I have been blessed with the opportunity to learn more and to practice. So appreciate your support.
LikeLike