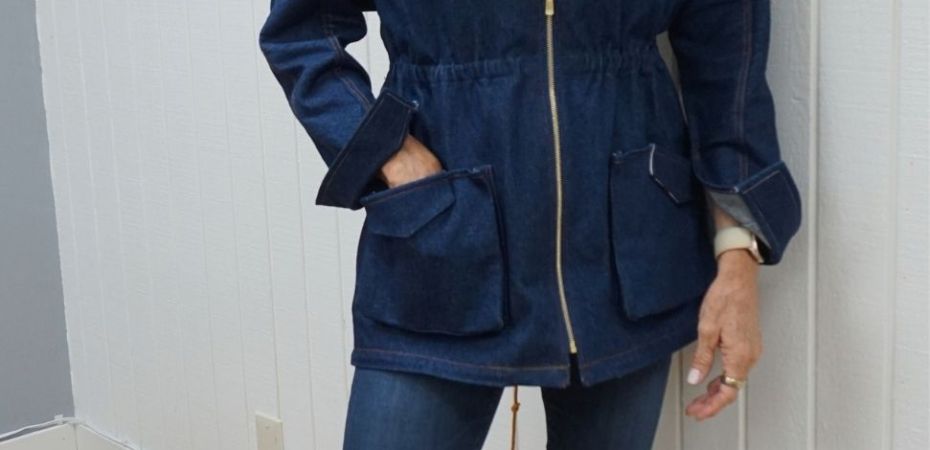
Can you believe it’s fall already! It’s almost time to wear a fall jacket. Fortunately, Anita by Design‘s make of a McCall’s anorak M6531 earlier this year inspired me. My journey from jazzed to jacket took more than 6 months as I made a muslin from reclaimed material, learned some, made a final version, and learned more! The good news is that I have two new jackets to wear just in time for fall. Vote on which one you like better at the end!
I got to share my makes at a recent American Sewing Guild San Jose California meeting! The lovely Judy Skender took photos of each of us in our makes.
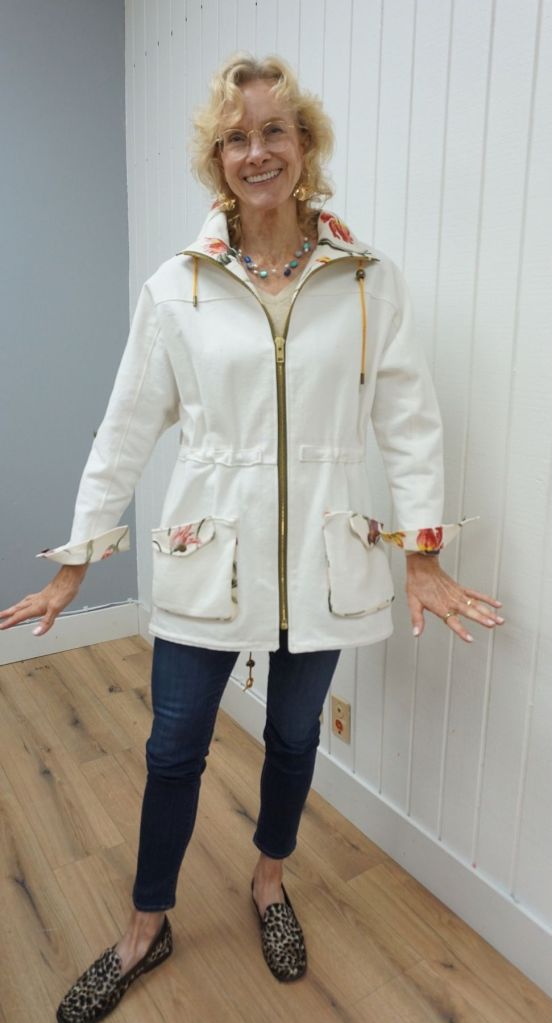
Photo by Judy Skender
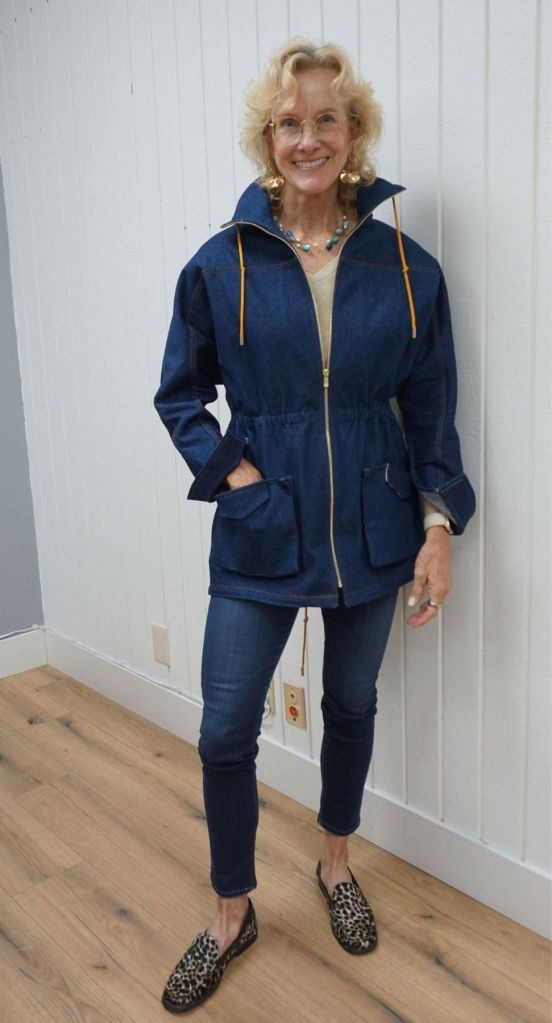
Photo by Judy Skender
The Rough Draft: Reclaim that sofa!
To make the white denim version I harvested fabric from an old sofa. (I made a moto jacket out of the same sofa!) The washable cushion covers had been pre-shrunk from multiple washings. I cut out the worn and stained parts (ew!) which left awkward shaped pieces of fabric. To create large enough pieces for the front and back, I patched pieces together.
The floral IKEA collar and cuff fabric are also reclaimed from a different trial garment. I also reclaimed accumulated spare buttons from store bought clothes that I no longer owned.
I’m delighted with the result.


Lessons Learned
From the muslin, I learned that the unfinished interior seams were too messy for me. I decided to try flat felled seams that hide all the mess in the final version. I also got feedback that my zipper in the muslin was too manly/chunky (oops!) so I scaled down from a #10 to an #8 then to a #5 zipper. I didn’t like the waist elastic channel being on the outside of the garment because it interrupts the flow of the back of the garment. Overall, while it took a long time to piece the fabric together, the sewing was not too difficult.
The Final Version
Once I finished the muslin, it was time to go on to the final version. My fabric choice was different. While denim typically has an everyday vibe (like workwear) it can be elevated in many ways. Anita by Design’s dark denim brought the drama. It was so beautiful that I used the same 14.25 oz (heavy!) Core Fabrics denim that she did.
Construction Changes
Omissions
I omitted the storm flap (too many layers to sew through, too bulky in front), the sleeve tabs for rolling up already super stiff sleeves, the cord keepers (hopefully a knot will do), and the buttons for the sleeve tab, sleeve, and pocket.
Seam Finishes
I sewed flat felled seams (my first time) to make the inside very neat. That’s why I’ve include photos of the interior of both the muslin and the final garment. I finished the front facing edge with denim selvedge for an interior surprise.
Cording, Casing, Zipper changes
I shortened the cording in back from 39″ to 24″ to keep it from dragging the ground or ending up in the toilet! I shortened the waist elastic by 4″ to give the garment more shape for my rather rectangular frame.
I moved the waistband elastic casing inside the garment instead of outside but used the same fabric and reduced the zipper size from #10 in the muslin to #5.
Final Version
Here’s the final version:


One of the details that gave me delight in both the muslin and the final version is the Follow the Flowers label by Road & Trip Pattern Co.


Main Lessons Learned
Flat Felled Seams
I learned more things the 2nd time I sewed this garment. It was my first time sewing flat felled seams. They were pretty easy except in two cases. Transitioning from flat felled at the sleeve seam to double fold for the sleeve opening at the cuff was tricky. I didn’t get it right either time. Just less wrong. (Ugh!)
Also, stitching one flat felled seam over another like at the center back or the side seams was tough with my machines even with a stump jumper. At times I was stitching through 8 layers and couldn’t when it was 12 layers. Neither my Singer Industrial or my Bernina Record 730 liked that very much. I collected a nest of thread nests along the way! A Juki industrial machine would do a better job of powering through the bulk.
Topstitching
Another thing I learned by experience is that contrast top stitching that looks like a vibrant contrast close up will lose some of that weight and pop when you’re a few feet away. Heavier thread, longer stitches, and double stitches help counter that.
The Value of Suprise
In the final version I added fewer surprising elements than in the muslin. After finishing the deep dark dramatic version I realized that those surprises were at least half the fun for me. I need to find a way to serendipitously add more of these to future garments and to not be so focused on making a more perfect garment but rather a more dramatic AND delightful garment.
Thicker Fabrics
These last three learnings are all about working with thicker fabrics and making them look nice. I’d like to try sewing silk organza into the collar to give it more poof and shape. The waist elastic was a bear to distribute the fabric over. Next time I’ll use super wide bias tape rather than the super thick denim. I should have also used a thinner fabric to make the pocket gusset to make the pockets lie more flat.
If you’ve made it this far, thank you so much for reading!
How Long did it take?
I’m always impressed by those who crank out 5 garments in a weekend. Sadly, that’s not me. These 2 garments took me more than 6 months to complete. One of my goals is to become a more efficient sewist. Maybe in 2027.
Here are the two anoraks side by side. Let me know which you like better in the poll below!

Appendix
In case after all this you want to do a deep dive here are all the gory details:
- Style: Anorak
- Pattern: M6531
- Size: M
- Fabric: Core Fabrics 14.25 oz non-stretch organic cotton denim in True Indigo
- Threads: Gutterman Mara 70 Color 488, Gutterman 279
- Zipper: YKK #5 Excella Separating Golden Brass Metal Zipper
- Elastic: Dritz non-roll elastic ½”
- Aglets: plastic heat shrink for sneakers and metal
- Grommets: Gold
- Needle: Schmetz jeans single
- Woven Label: Road & Trip Pattern Co

